Record Windows Desktop with NVIDIA GeForce Experience
NVIDIA Geforce makes many tools and technologies available to us that we can use when buying one of their graphics cards. Among them is NVIDIA GeForce Experience, a software that offers many other possibilities and manages the installed drivers. Among them, it allows us to record games and even the Desktop. This tutorial will teach you how to record the Windows desktop using the NVIDIA GeForce Experience software.
In addition to this free software that we can download from its website. Depending on the card model you have, you can use the different options offered by the program. In addition, you will be able to update the drivers from this same program simply by making a couple of clicks.
With NVIDIA GeForce Experience, you can decide the quality of the recorded video and use multiple settings that will adapt to your needs. You can even continuously record the previous minutes that you indicate. It also allows you to use limited space for video recording, so you don’t run out of storage.
We are going to see, in easy steps, how to record Desktop with NVIDIA GeForce Experience software.
How to enable desktop recording step by step
It is necessary to have the option to record the Desktop enabled to record it. In this way, we can do it using keyboard shortcuts, just like in games.
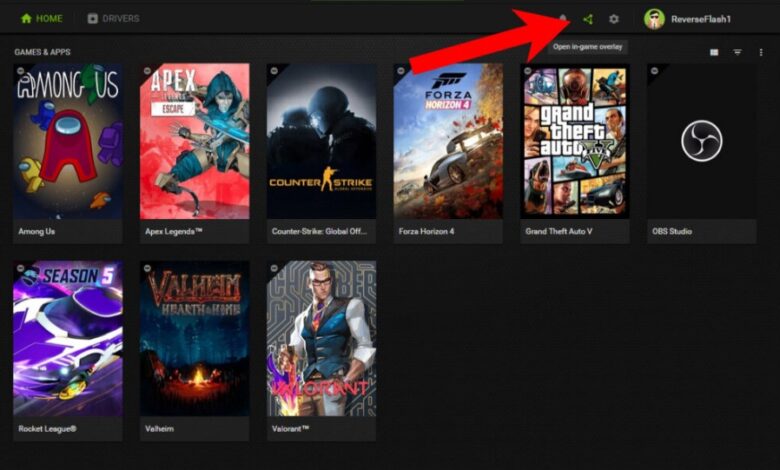
- Open the NVIDIA GeForce Experience software and go to the options on the gear wheel.

2. You must have the In-Game Overlay option checked. This will allow you to overlay the NVIDIA GeForce Experience settings over any window on your PC.

3. Now click on Settings to access the different options.

4. Look for the Privacy Control option at the bottom and click on it to enter.
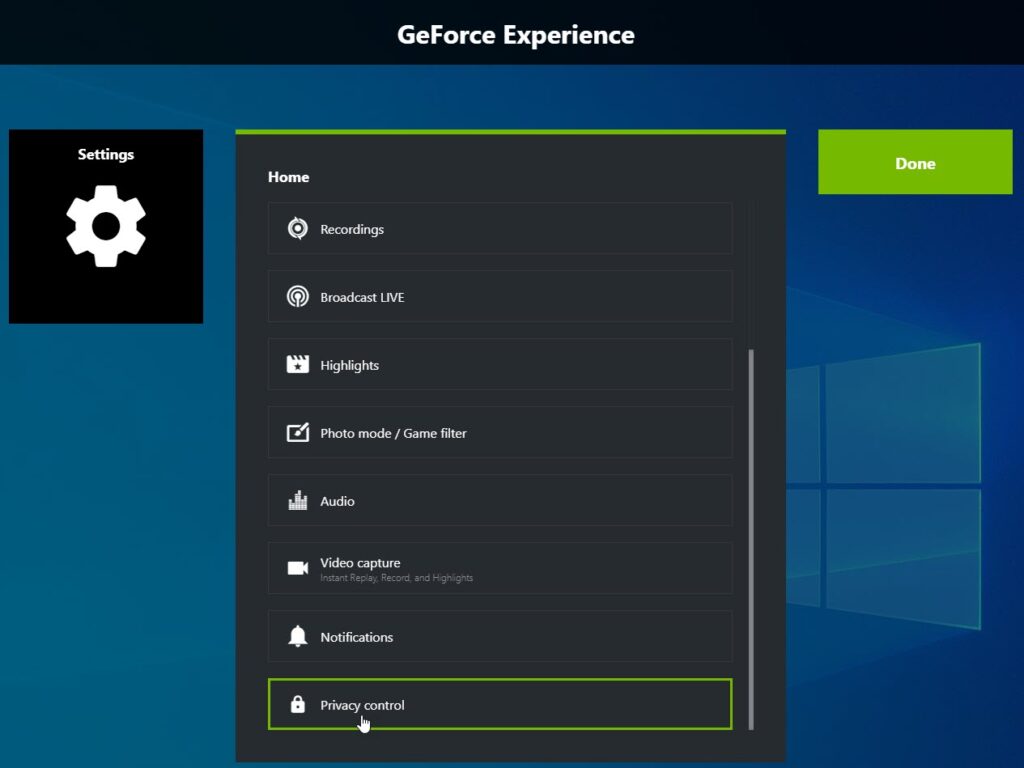
5. We have to enable Desktop Capture if we don’t already have it.
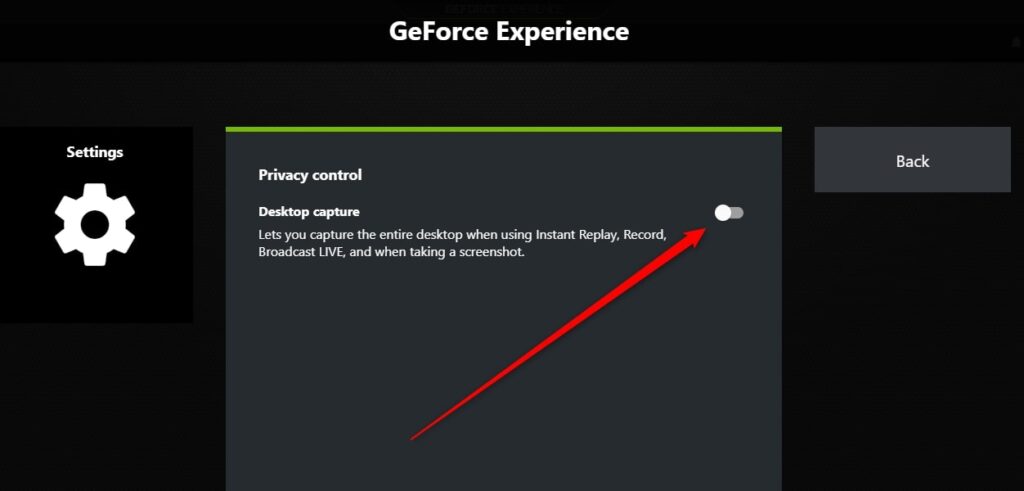
Once this last option is enabled, we will make the desktop recordings.
We only have to navigate through the different configurations available to configure the video that we will record and where to save it. You can also configure how to start the recording quickly using keyboard shortcuts.
How to Configure Desktop Recording with NVIDIA GeForce Experience
Now we have to configure these desktop recordings to our liking. The NVIDIA software offers us the possibility of adding custom folders to save the videos and the temporary ones used for continuous recording. Let’s see how to do it.
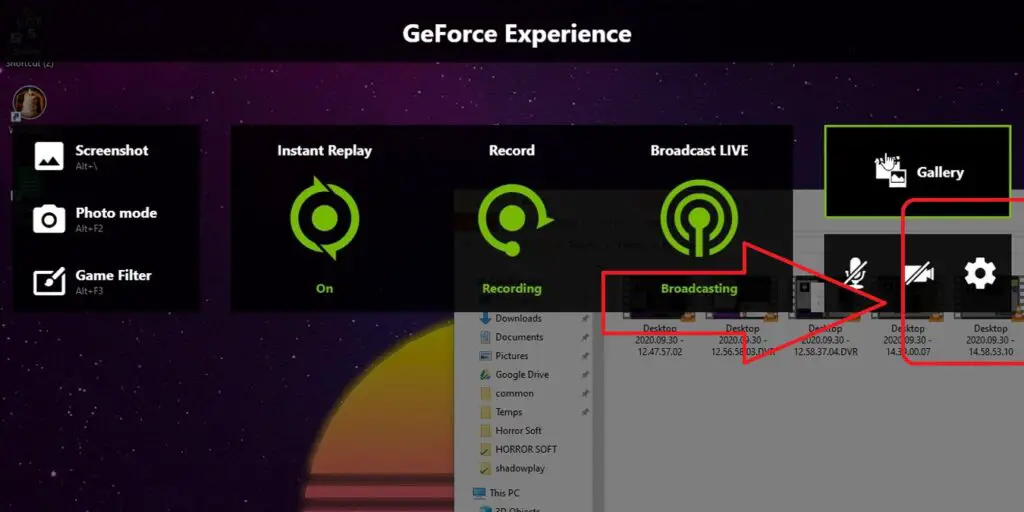
- Press Alt+Z on the keyboard, and it will open the GeForce Experience menu.
- Now we click on the Cogwheel to access the Settings options.
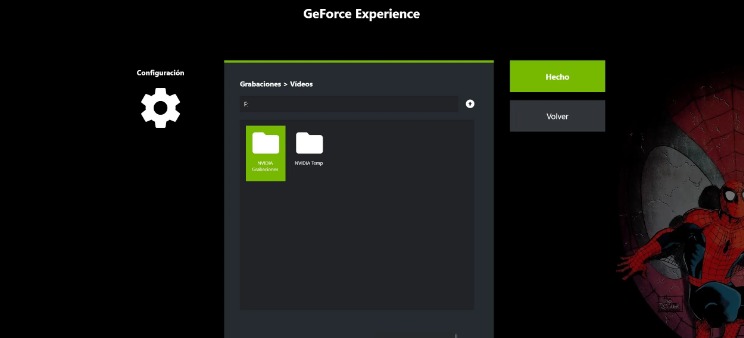
3. Look for the Recordings option and access it.

4. In this option, we choose the folders where we want the videos to be saved and the temporary folder used for the recordings.
5. Now, we click Back and look for Video Capture towards the bottom of the options.
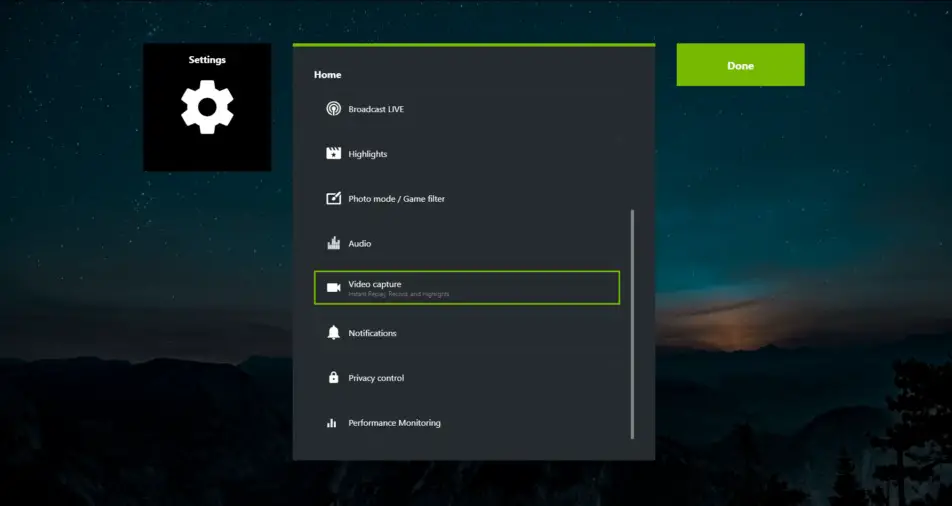
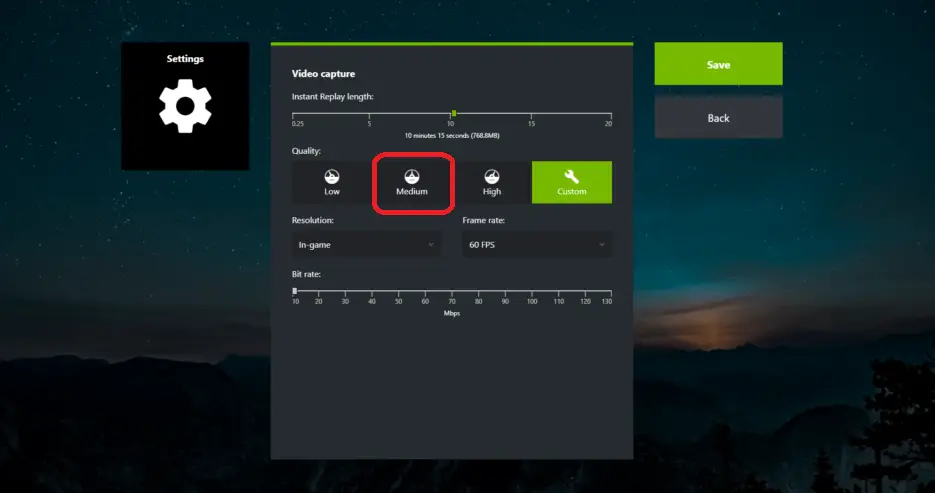
6. In this section, we can set the Instant Replay time we want. Further down, we set the video quality. We can select between the predefined Low, Medium, or High. However, we can also customize it and adjust the Resolution, FPS Rate, and Bit Rate values ourselves. We will have to change this according to the space we have available.
Now we can start making our recordings. All these configurations we have made and some more available also help us record our games with this NVIDIA GeForce Experience software. Now let’s see how to register the Desktop straightforwardly.
How to Record Windows desktop with Instant Replay
With this configuration done, we can enable the Instant Replay option. This option allows us to continuously record the time we have established permanently to have the video available. For example, we have selected to record the last 10 minutes in our case. This will record continuously to make the previous 10 minutes of video available.
To enable Instant Replay, we can do it in two ways, by entering the GeForce Experience menu or with keyboard shortcuts.
- Press Alt+Z to enter the GeForce Experience menu.
- Click on Instant Replay.
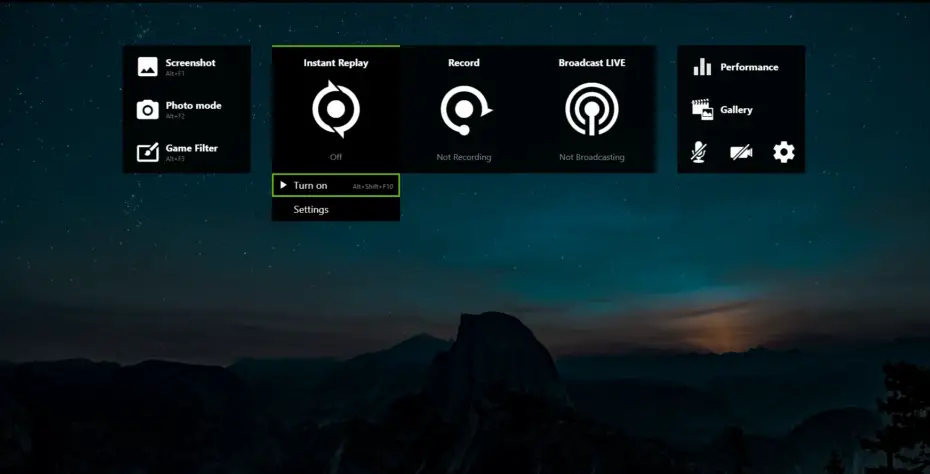
3. Now, we click Start. It is already enabled until you decide to stop it.
Instead of following these steps, you can press Alt+Shift+F10, and it will instantly enable and disable it.
To save the Instant Replay videos, you will have to do it from the menu or a keyboard shortcut. Videos can only be saved if the option is previously activated. Let’s see how.
- We enter the menu by pressing Alt + Z.
- Click on Instant Replay
- Click on Save to obtain the video with the minutes we have configured. If it has been active in less than the configured time, it will be saved ultimately. You will find the videos in the folder configured above to store them.
Record on Desktop manually.
We can also record the Windows desktop manually, and this is by starting the recording and stopping it when we want. We also can record the video by entering the GeForce Experience menu or doing it with a keyboard shortcut.
- As usual, we open the GeForce Experience menu with Alt+Z.
- Now we click on Record.
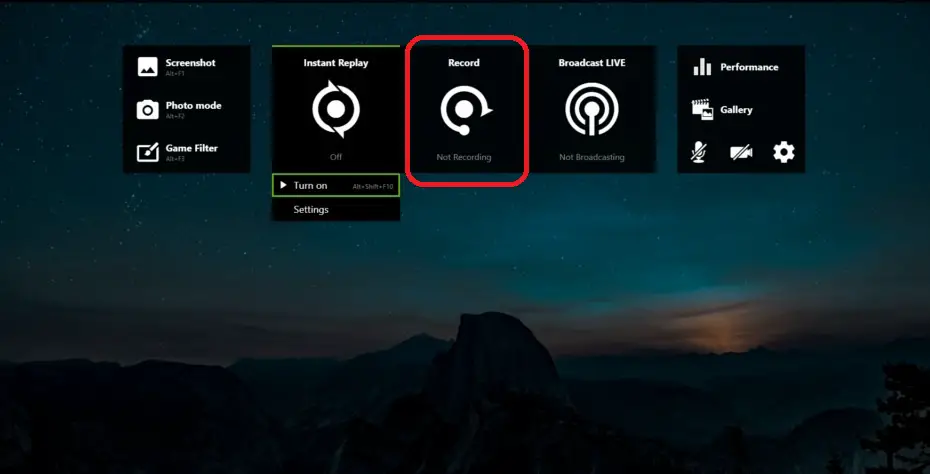
3. It only remains to click Start Recording to record the Desktop.
Or, instead of this, we can press Alt+F9 to start the recording. We can do the steps before or press this combination of keys again to finish.
In this case, the video will last as long as we have had the recording option in progress. We will find it immediately in the folder that we have chosen before.
